Is It Safe for Me to Relight My Gas Water Heater Pilot Light?
Relighting the pilot light of your gas water heater is safe if performed correctly. Before attempting to relight the pilot, check the manufacturer’s instructions and ensure all ignition sources are removed from the area.
Begin by checking for gas leaks using both smell and a gas leak detector.
Key steps involve turning off the gas via the control valve, waiting for any potential gas accumulation to dissipate, and then setting the valve to 'pilot’.
For electronic models, press the igniter button; for manual ones, use a long lighter to ignite the pilot. Keep the gas valve depressed for 30-60 seconds after the pilot lights. Only then set to the desired temperature.
If you follow safety precautions but are still unsuccessful lighting the pilot or suspect a leak, immediately turn off the gas and call a licenced technician. With proper care taken, relighting your water heater’s pilot can be a safe DIY task.
What You’ll Need Before Relighting the Pilot
Before attempting to learn how to relight your gas water heater’s pilot light, ensure you have the following items:
- Safety glasses
- Flashlight
- Long fireplace lighter or long matches
- Manufacturer’s instructions for your specific model
- Gas leak detector
Checking for gas leaks beforehand prevents the risk of explosion or fire.
With the necessary preparations made, you can ensure the pilot lighting process goes smoothly and safely. However, if any concerns arise, do not hesitate to call a professional plumber.
Locating the Pilot Assembly and Gas Control Valve
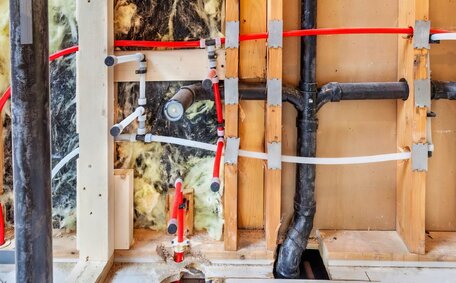
You’ll find the pilot assembly and gas control valve behind the access panel, usually on the side or bottom of the water heater. Begin by identifying the access panel, which might be fastened with screws or clips. Carefully remove the panel.
With a flashlight, locate the gas supply tube leading to the pilot light. The pilot will look like a small nozzle and flame. The gas control valve will be connected to the pilot assembly by a thin metal rod. This knob or dial regulates the gas flow from the supply line.
Before proceeding, use a screwdriver to turn the gas valve fully clockwise to the 'OFF’ position. This cuts off the gas supply to allow any built-up gas to dissipate. Confirm the pilot is off and utilise a gas leak detector to examine connections for leaks before attempting to relight.
Once the gas supply is off, the access panel open, and the pilot assembly located, you can safely proceed with manufacturer’s instructions on how to relight. Remember safety is the top priority, so call a professional if uncertain during this process.
Shutting Off the Gas Supply
Shutting off the gas supply is the first and most critical step in learning how to relight your water heater’s pilot light. To do this:
- Locate the gas control valve on the gas supply line leading to the pilot light assembly. This is usually found behind the access panel.
- Turn the valve anticlockwise to the 'OFF’ position carefully. You’ll likely feel it stop rotating. This stops the flow of gas to the pilot.
- Wait a minimum of five minutes for any residual gas to dissipate. This crucial safety step prevents risk of ignition.
- Then, Remove all flames and potential ignition sources from the area. Check the full vicinity by sense of smell for any lingering gas odours.
- Assuming no leaks are present, you can now safely proceed with the relight pilot steps per the manufacturer’s guidelines.
Taking the proper time to shut off the gas and ensure the area is free of leaks prevents the hazards of fire or explosion. Safety first is vital when dealing with gas appliances. If doubt arises during the process, promptly contact a professional.
Step-by-Step Guide to Relighting the Pilot
To safely ignite your gas water heater’s pilot, follow these steps:
- Locate the gas control valve on the appliance and turn it clockwise to the full "OFF" position.
- Turn the gas control knob counter-clockwise to the "PILOT" position.
- While igniting the pilot, press down on the control knob. Use an ignition button if electronic or a long lighter if manual.
- Replace the access panel and verify proper heater operation.
Manual Lighting vs Electronic Ignition
There are two main types of ignition systems found in gas water heaters - manual and electronic. The method for lighting your pilot will depend on the specific model.
Manual Lighting requires using a long match or lighter to ignite the pilot flame. You will need to hold the gas control knob down while lighting manually. This directs gas flow as you introduce the flame.
Electronic Ignition entails pressing a button that creates an electric spark to light the pilot. Often there will be separate igniter buttons for the pilot and the main burner. After lighting, maintain pressure on the pilot gas control knob for 30-60 seconds before releasing.
Electronic ignitions are found in newer gas water heater models. If your unit has a dial without a push button, it is a manual system requiring a match/lighter for lighting the pilot. Follow the exact manufacturer’s instructions.
Regardless of the system type, adhere to all necessary safety measures, including removing ignition sources, checking for gas leaks, keeping control knobs pressed during ignition, confirming the pilot is lit, and contacting a technician if problems occur.
Testing the Pilot and Turning the Gas Back On
Confirm proper ignition of the pilot before restoring the gas supply. For models with electronic ignition, an indicator light on the gas control valve normally signals the pilot is lit. For manual ignitions, visually ensure a consistent pilot light is present.
To test the pilot:
- After lighting, keep the gas control knob depressed for 30-60 seconds, then release.
- Ensure the pilot flame is consistently lit. Check visually or by the indicator light.
- If the pilot goes out, repeat the lighting steps, ensuring to keep the control knob pressed for at least 60 seconds after igniting.
- With the pilot lit, turn the gas control knob counter-clockwise to the desired temperature setting. This will allow gas to flow from the supply line to the main burner.
If the electronic ignition includes a 'pilot’ safety button, it must be pressed while activating the gas supply. This is an important manual step for testing the pilot.
After confirming the pilot is functioning correctly, reattach the access panel and check that the water heater ignites the main burner to start heating water. Contact a technician immediately if you encounter any issues during re-testing.
Troubleshooting Common Pilot Light Issues
You may encounter common issues when attempting to relight your gas water heater’s pilot light. Being aware of these potential problems and their solutions can help get your hot water flowing again.
Pilot Won’t Stay Lit
If the pilot flame goes out when you release the gas control knob, there are a few likely causes:
- If the thermocouple needs heating, hold the knob down for a solid 60 seconds after lighting before releasing.
- Faulty thermocouple - This safety device may need replacement if pilot won’t stay lit.
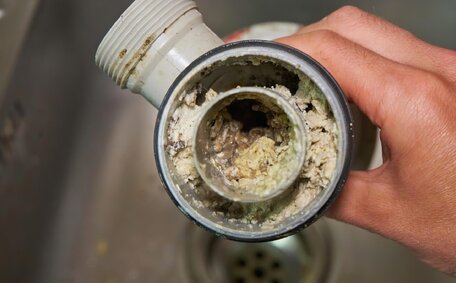
- Obstructed pilot orifice - Check for spider webs or other blockages preventing gas flow.
Pilot Lighting But Burner Not Igniting
If the pilot stays lit but the main burner won’t ignite, the issue may be:
- Gas control valve defect - Valve not opening properly preventing burner gas flow.
- Obstructed gas line or burner - Check supply lines and orifices for blockages.
For either pilot or burner issues, carefully review manufacturer instructions on how to relight in case steps were missed. If problems persist, call a professional plumber to investigate and make necessary repairs for safe appliance operation.
When to Call a Professional Plumber
While understanding how to relight your gas water heater’s pilot light is often a straightforward DIY task, certain situations call for contacting a professional plumber for assistance:
- You smell gas before or during the relighting attempts
- The pilot cannot be successfully relit after several careful tries
- The pilot lights but the main burner does not ignite
- Other concerning issues arise like strange sounds or error codes
The licensed technicians at Peakhurst Plumbing are thoroughly trained in troubleshooting and repairing gas appliances. If you’re in the Sydney area and require expert assistance to restore your hot water, reach out to us at 1300 349 338 or via jobs@peakhurstplumbingservices.com.au.
With over 25 years of experience in Peakhurst, we are equipped to address all types of water heater issues. Instead of risking DIY repairs, utilise our expertise for quick and precise solutions.
We even offer emergency after-hours services for urgent hot water needs. Trust us as your professional ally in restoring safe, reliable comfort to your home.